Connect to a database
You can connect your application to an external data source, by following these steps:
Create a table, button or a menu widget on your page.
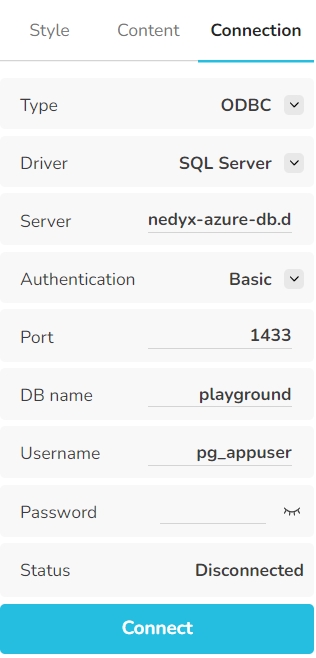
Select the widget, and open the Connection tab on the right.

3. Enter the following information about the connection:
Type
The type of the connection. Supported connection types are ODBC, OData, Essbase MDX, SAP MDX, Microsoft Analysis Services (SSAS), Smartbooks AI and Google Sheets.
Driver
The driver type of the connection. For ODBC connections, PostgreSQL and Microsoft SQL Server are available options.
Service root url
The url of the service root of OData services. E.g. https://services.odata.org/V4/northwind/northwind.svc/
Server
The name of the database server. This can be an IP address or a DNS name.
Authentication
The authentication option to connect to the database. Depending on the connection type, the following options are provided:
Basic - The current user logs in with username and password.
Basic with the option Technical user - The database credentials are stored in the app and automatically applied in Live mode when a user logs in to the database.
Bearer token (REST only) - When connecting to a REST api that supports authentication via a bearer token, the corresponding bearer token for communication can be saved in the "Token" field.
Logon ticket (SAP MDX only) - If nedyx is running in an environment in which a logon ticket (or "MYSAPSSO2" cookie) is issued via SAP authentication, this is used to log the current user on to the SAP MDX connection.
OAuth2 - The user is redirected to the authentication process which is specified for getting access to the database.
Port
The port of the database server.
DB name
The name of the database.
Username
The name of the technical user you want to use for the connection.
Password
The technical users password.
Note: Your password is secure. It is stored in an encrypted way on the nedyx server. After is has been entered and saved in the Database tab, nobody is able to access the password.
Reference
If the widgets uses the connection from another widget, the name of this widget is displayed here. See chapter Connection propertyfor more information.
4. Click on Connect to connect to the database.
After a successful connection, the status changes to Connected. If the connection was not successful, please check the connection parameters.
Note: Usually connections to a cloud database like Azure SQL Server are restricted by firewall rules. Please use the ip address from the nedyx server 3.69.202.43 as client address, so that nedyx can access your database server.
Last updated
